Building a solid-state mini-ITX Linux recording studio
Jun 2, 2004 — by LinuxDevices Staff — from the LinuxDevices Archive — 7 viewsThis simple embedded Linux project builds a dedicated music recording and editing computer that uses a CompactFlash card instead of a hard drive, to eliminate hard disk chatter. The project is simple because it starts with an embedded Linux distribution: a “Live CD” released last week by the Agnula Project.
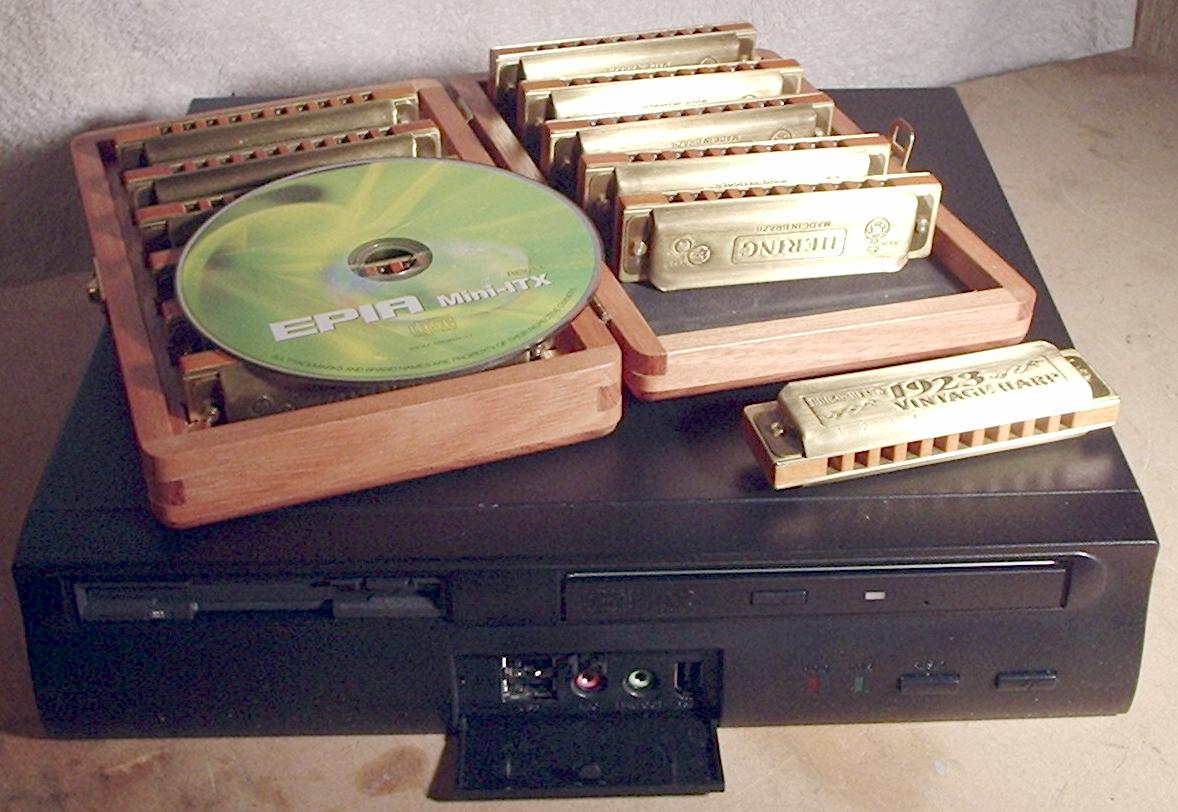
The finished system, with a 12-pack of harmonicas for “scale”
(Click to enlarge)
The Agnula project aims to create a GNU/Linux audio distribution that can meet the needs of professional recordists. It offers a Red-Hat based “ReMuDi” version, as well as a Debian based “DeMuDi” version. Live CDs are only available in the latter version, currently.
Installing the live Agnula/DeMuDi CD image onto a CompactFlash, instead of running it from the CD, results in the following benefits:
- It frees up the CD drive, which can now be used to burn CDs
- CompactFlash read speeds are generally faster than CDs', resulting in a little more snap, and less chance of drive spin-up introducing unwanted noise.
- Since the iso image is compressed, using the cloop filesystem, we'll get nearly 3GB of the best, latest audio applications — along with a real-time Linux kernel — in just 650MB of Flash storage space that is mounted read-only, to maximize the life of the CF card. The system will use a ramdisk filesystem for the ultimate in disk I/O, but a second read-write partition on the card provides file storage for “keepers.” With a 2GB flash card, the second partition can hold two CDs worth of data, or one CD worth of wav files, and one CD iso image.
Okay, let's build some hardware.
Hardware
Parts list:
- VIA MII 12000 motherboard, which comes with IDE cables
- 512 MB of DDR266 SDRAM, the fastest the above VIA board can handle, in a “low profile” package (mini-ITX cases have low headroom!)
- 2GB SanDisk “Ultra” CompactFlash card — they claim 10MB/sec read/write, but despite many tuning attempts, mine tops out at about 7MB/s. Still better than 1.50 from my CD. And no seek time!
- 3.5-inch IDE – CompactFlash adapter
- DVD/CD-R/RW combo drive
- Slimline CD to 3.5-inch IDE adapter
- (optional) Slimline Floppy drive
- (optional) Slimline to desktop floppy cable adapter
- Morex case with DC-DC converter and power brick
- Creative Labs Soundblaster Live! soundcard (emu10k1 type). I asked M-Audio to supply a Delta 44, but it did not arrive in time. The VIA has pretty good built-in audio, but Agnula never seems to get along with integrated audio chipsets very well, in my limited experience. The add-in Live! card works much better for full-duplex (recording and playing back at the same time)

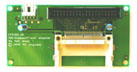
The 1200MHz MII 12000 is VIA's first mini-ITX board with a full-speed floating point unit (FPU), for better multimedia performance
(Click to enlarge)
System preparation
The VIA board has a CompactFlash slot on a Ricoh CardBus chip, and it may have been possible to boot the system from this slot, with some work, by building an initrd image with PCMCIA and ide_cs modules. Way too much work!
 IDE-CompactFlash adapters (the one I used is shown at right) are about $20. Some adapters are fancier, and come with floppy-bay cases, lights, and everything. CompactFlash cards are designed to respond to IDE commands, and the IDE-CompactFlash adapter has no electronics. It simply passes the CF pins to the IDE connector pins. It has a single jumper switch, which I closed to make the CF card the master. I connected it to the primary IDE bus, so it would appear in the system as
 /dev/hda.
My adapter used a floppy connector, and the Morex case only had three, so I had to use a splitter with the unused harddrive cable. I also had to fabricate a thingee out of some angle brackets to hold the adapter and card securely in the drive bay.
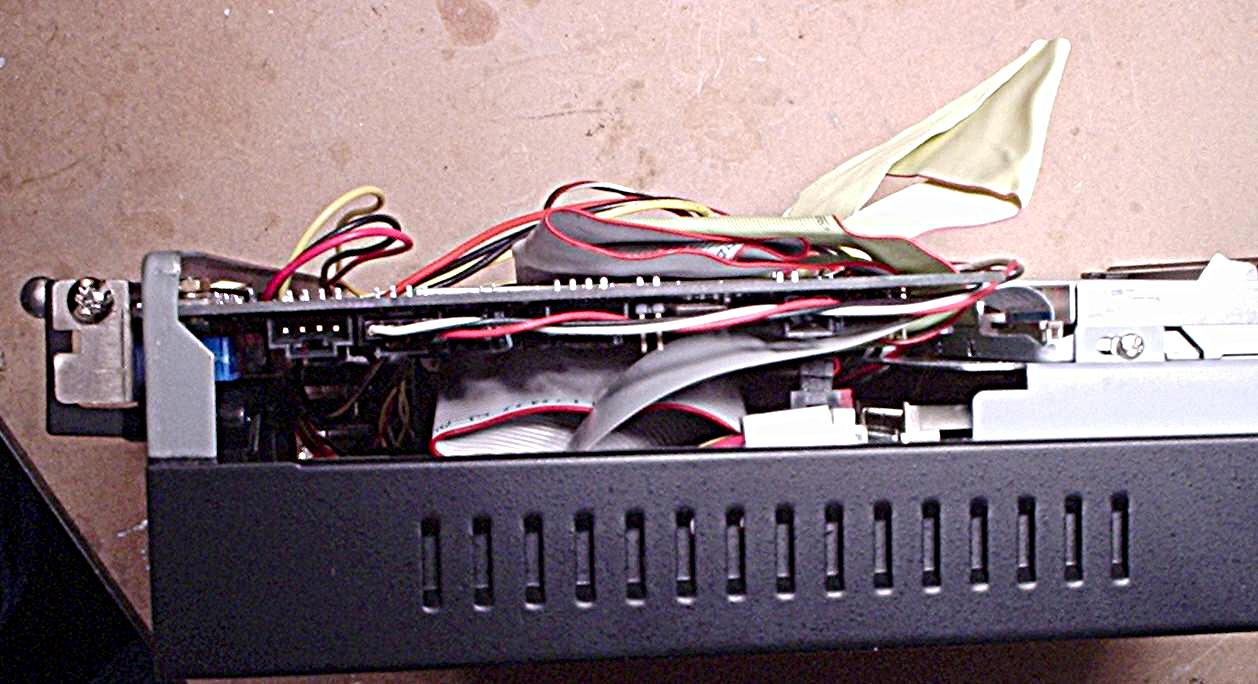
The CF-IDE adapter, installed in the drive bay. Note that if this system had a hard drive, it would be inches away from the sound card, with it's cable wrapping around. Not good from an RF interference standpoint!
(Click to enlarge)
I set up the combo drive as the master on the secondary drive /dev/hdc.
First boot
First, we use another machine to download the Agnula/DeMuDi Live CD 1.1.1 image (mirrors here and here) and burn it onto a CD, which we then boot on the new machine. The Live CD uses the excellent Knoppix system to detect hardware and boot on a ramdisk into a KDE/Debian environment.
Next, we use fdisk to created two type 83 (Linux) partitions on the CF card. I made /dev/hda1 650MB, just large enough to contain the A/DeMuDi Live CD image. The other partition fills the remainder of the card:
Disk /dev/hda:
2048 MB, 2048901120 bytes 64 heads, 63 sectors/track, 992 cylinders
Units = cylinders of 4032 * 512 = 2064384 bytes

   Device Boot      Start         End      Blocks   Id  System
    /dev/hda1  *            1         316      637024+  83  Linux
    /dev/hda2             317         992     1362816   83  Linux
After writing the partition table, we use mkfs-ext2 to create ext2 filesystems on both partitions. We then use rebuildfstab to make Knoppix aware of the new drive.
[email protected]# mkfs.ext2 /dev/hda1
[email protected]# mkfs.ext2 /dev/hda2
[email protected]# rebuildfstab -r
Because we want to treat the CF card as gently as possible, we edit /etc/fstab, adding the “noatime” option to prevent the system from continually recording each time a file is accessed:
# Added by KNOPPIX
/dev/hda1 /mnt/hda1 ext2 noatime,noauto,users,exec 0 0
# Added by KNOPPIX
/dev/hda2 /mnt/hda2 ext2 noatime,noauto,users,exec 0 0
Then we mount both partitions:
[email protected]# mount /mnt/hda1
[email protected]# mount /mnt/hda2
Now it's time to copy the compressed cloop file system from the CDROM to the CF card. Issuing the mount command shows us it's mounted at /cdrom. Next, ls /cdrom shows it contains a KNOPPIX directory and a boot directory. We're going to copy the KNOPPIX directory, but we'll build our own special boot directory. Like this:
[email protected]# cp -ar /cdrom/KNOPPIX /mnt/hda1
[email protected]# mkdir /mnt/bootimage
[email protected]# mount -t vfat -o loop /cdrom/KNOPPIX/boot.img /mnt/bootimage
[email protected]# mkdir /mnt/hda1/boot
[email protected]# cp -ar /mnt/bootimage/* /mnt/hda1/boot
We're almost done! The only thing left to do is to make the CF card bootable, using some special lilo magic. CD to /mnt/hda1/boot and type vi lilo.conf and do something like this, which worked for me:
lba32 # if your CF card uses it
boot=/dev/hda # install lilo in master boot record of CF disk
backup=/dev/null # don't bother to backup the old MBR
prompt # lets you pick among several kernels, if you like
timeout=30 # wait 3 seconds before booting, to allow add'l options
vga=791 # use cool framebuffer console, with boot penguin logo
root=/dev/hda1 # where to look for the root filesystem
image=/boot/vmlinuz # location of kernel
      label=Knoppix # name of kernel
      initrd=/boot/miniroot.gz # location of initial boot image
      read-only # in case of errors, mount read-only
      append="ramdisk_size=100000 init=/etc/init lang=us apm=power-off
hda=scsi hdb=scsi hdc=scsi hdd=scsi hde=scsi hdf=scsi hdg=scsi hdh=scsi
nomce quiet BOOT_IMAGE=/KNOPPIX/KNOPPIX" # for info on these, lookup
"knoppix cheatcodes"
Once the file is set up to your liking, force a symbolic link to overwrite the /boot directory in your ramdisk filesystem, and run lilo:
[email protected]# ln -sf /mnt/hda1/boot /
[email protected]# lilo -C /mnt/hda1/boot/lilo.conf
Added Knoppix *
Assuming all went well, go ahead and reboot without the CD, and you should be welcomed by a nice embedded Linux audio distribution.
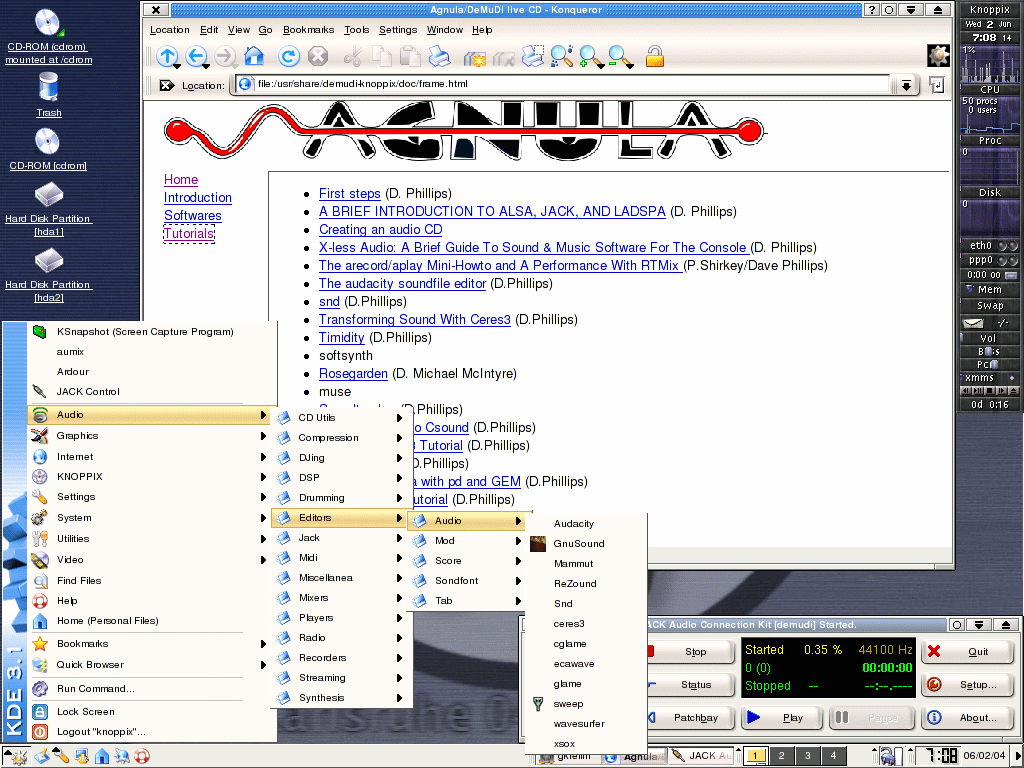
A/Demudi starts jack automatically, and offers nearly every Linux audio application imaginable — and many general purpose applications, too
(Click to enlarge)
Additional configuration options
Knoppix Live CDs have some interesting features for saving configuration and user files. When you boot A/DeMuDi from a CF disk according to the method above, you will only be able to mount /dev/hda1 as read-only, as Knoppix takes full control of the partition containing the root filesystem. However, /dev/hda2 will be writeable. So, you might want to investigate the options under the KDE ==> KNOPPIX ==> Configure menu, and then consider adding home=scan and myconfig=scan to your lilo.conf file and rerunning lilo according to the instructions above.
Especially interesting is the ability to save your /home/knoppix and other files using an AES encrypted filesystem. This is rather swell, as it means that even if the RIAA should seize your computer, they wouldn't be able to find those Grey Album samples in your home directory without typing in the proper 20-letter or longer password or buying some serious super-computer time. This would be especially nifty if you could get it to work using the hardware PadLock Ace AES engine in the C5P core C3 chips from VIA. This is left as an excercise for the (much geekier than I) reader.
Also nice would be the capability to edit the cloop compressed files in /KNOPPIX/KNOPPIX directly. This would save minor annoyances such as always having to edit /etc/fstab to add the “noatime” option to /dev/hda2. Cloop compressed filesystems are created with some flags to mkisofs that add compression; there ought to be some way to edit the files mounted under /dev/cloop, and remake the /KNOPPIX/KNOPPIX CD-ROM image, but I have not yet investigated doing so. It might require a full set of Knoppix build scripts, though, I don't know.
General notes
The A/DeMuDi kernel is based on Linux 2.4.24 — just recent enough to include pretty good support for the chipsets used on the VIA board. Support for several VIA mini-ITX chips was added right around 2.4.23.
I did have trouble with Ethernet chip onboard the bleeding-edge VIA MII 12000 board. It worked on the initial boot, using the via-rhine driver, but afterwards failed with an error message about an invalid MAC address.
The VIA board came with a CD of drivers, including source code for a new Ethernet driver. The kernel headers were unfortunately not included on the A/DeMuDi CD, though, so I was unable to build the driver. I wrote to someone at Agnula.org, who promptly sent me the kernel config file. Eventually, I'll build the driver and stash it somewhere on /dev/hda2.
Meanwhile, I used a PCMCIA Ethernet card I had lying around. It's very convenient to be able to use your various PC cards — and CF cards — in your desktop system! The MII 12000 has nearly every I/O interface you could ever imagine, including four USB ports, FireWire, S-Video, RCA-Video, S/PDIF (only for native audio chipset), CF and PCMCIA CardBus slots (supporting single and double-height cards of each type), IrDA, and on and on and on…

I decided that the VIA's MII 12000's 18 back panel connectors were not enough, so I routed harddrive cables out the back, for good measure. The system fans on the right are unused.
(Click to enlarge)
Once I had installed the PCMCIA card, I made a script to start the network:
#!/bin/bash
/sbin/ifconfig eth0 192.168.1.120 netmask 255.255.255.0 up
/sbin/route add default gw 192.168.1.254
echo "nameserver 192.168.1.254" >> /etc/resolv.conf
exit 0
I put this in /dev/hda2, and type sh /mnt/hda2/network.sh to bring up the net, should I need it.
I have only had a chance to record a couple of simple things so far. But, I have to say, Agnula/DeMuDi is really impressive! It would have taken me a very long time to get a system configured in anything close to as functional a state. I had previously made some attempts to get jack and ardour working, but doing so requires quite a bit of kernel patching, as jack requires the low-latency and kernel pre-emption patches, yet does not yet seem to work with kernel 2.6, which includes these as configure-time options.
I used the desktop version of the C3 for this project, which uses a very quiet “fan-sink” fan. Someone with more professional requirements should consider using one of VIAs boards based on the fanless Eden processor. The Eden is the exact same processor as the C3 on the board I used, but tested and prepared differently for greater heat tolerance, in order to support fanless operation at slightly reduced clock speeds. With an Eden-based VIA board, you should be able to create a completely solid-state recording system without a single moving part, other than the CD-burner, floppy drive, and the power switches.
Older VIA motherboards should work fine, too; although, the C5P-based C3s, found in MII 12000 and newer VIA boards, are the first to feature a full-speed floating point unit, which probably helps out with multimedia operations quite a bit.
If you'd like to try out Agnula, but you're not too sure you want to spend upwards of $150 on a 2GB CompactFlash card, be aware that you can also install the Live A/DeMuDi 1.1.1 CD onto a harddrive, either natively (on an uncompressed, read-write, normal filesystem), or onto a cloop filesystem much as I have described above, but using a normal harddrive in place of the CompactFlash card. The Agnula Website has instruction on the former approach; the above howto should be helpful in case you want to try the latter route, which will result in a quieter system, since the drive could tuned with hdparm to spin down except when launching applications.
Have fun! . . .
 About the author — Henry Kingman has edited LinuxDevices.com for nearly a year. Prior to that, he spent a year sitting in a cool basement learning guitar, bass, and harmonica. He likes old-time fiddle tunes, and lots of other stuff, too.
This article was originally published on LinuxDevices.com and has been donated to the open source community by QuinStreet Inc. Please visit LinuxToday.com for up-to-date news and articles about Linux and open source.